Showing posts with label gifts. Show all posts

Thursday, September 4, 2008

Easy Wall Art

We made some fantabulous canvas wall art that goes for big bucks at Pottery Barn and Pier 1, but was pretty cheap and VERY easy to make. If you want the project to be more involved, you can really go to town with different mediums and embellishments. We'll give instructions for the easy way, then extra tips for the more extravagant route. (For ideas on the more extravagant route, check out these ladies at http://winborgdesign.blogspot.com/)

You Will Need:
  • Stretched Canvas, any size or dimension (available at craft and art stores, we got ours on sale at JoAnne's for half price)
  • Mod Podge or other craft glue. This will be used to glue and seal our project so make sure that it is a glue that dries clear.
  • Sponge brush (also available in craft stores, but also at Walmart, usually 3 for $1)
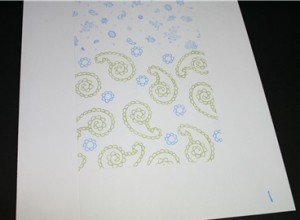
  • Scrapbook papers
  • (Optional) Cheap acrylic paints that match your papers (you can get these at walmart for about $1 a piece, and you only need a few)
  • (Optional) Paint brush (something big and chunky will do the trick)
Creating the Art:
  • Decide what you want on your canvas. Emily got her inspiration from some Pottery Barn flower art. You could do animals, geometric shapes, something related to your child's hobby, anything! We saw a very cute one on 3 canvases that was a catarpillar with 2 big green paper circles of different patterns on each canvas, and little feet painted on. Get Creative!
  • Cut out your paper in the shape/size that you want (we made a template first so as not to make mistakes on our cute paper).
  • (Optional) Use paint in matching/accenting colors to add shadow, contrast or pizazz to your shape- especially if you will be layering multiple papers.
  • Let dry
  • Use your sponge brush to cover the back of your paper image with glue, making sure the entire shape is well covered.
  • Place in desired location on canvas and carefully smooth out any bubbles or bumps.
  • Once all pieces are in place, load sponge brush heavily with glue and begin brushing over the entire canvas. Go slowly over papered areas to prevent tearing or wrinkling. It is best to work brush strokes in one direction (up and down or side to side) for a more uniform look. Brush strokes will be visible once dry, but this is part of the "look."
  • Let dry, and hang!


Tips for Extravagance:
  • Add pictures to your art the same way you add paper. Black and white are particularly eye-catching in wall art
  • Scrapbook paper can be art in itself, create a collage of coordinating papers in different shapes and sizes, glue them on, seal with glue for a finished look and hang.
  • Distress: use sandpaper to rough up the edges of papers and pictures, Ink edges with black or brown stamp pads, water down white paint and fade a picture by brushing on a light whitewash, tear papers or even pictures (gasp!) to complete that vintage look.
  • Embellish: Stamp or write letters, slogans or phrases, add brads, eyelettes, decorated tags. You can also paint or ink large chipboard letters for a more stand-out look.
  • Glue on decorative jewels after the project has been sealed to really make your project pop!

Thursday, March 6, 2008

Bag-A-Lopes


Next Project: Bag-A-Lopes
It's a gift bag made out of an envelope! These are inspired (aka copied) from my FAVORITE website: splitcoast stampers. Each week they have a new little tutorial that teaches you how to do something fun with stamps. This one is from a while ago. If you don't use stamps, you can modify just about any project on the webpage and just use printed paper or stickers or other embellishments.


This is what you need:
  • 9x12 White Catalog Envelope (I think the envelopes I found are larger, just get the largest you can find)
  • Paper Trimmer with Scoring Blade

  • Bone Folder (it's okay if you don't have one, or if you don't even know what this is-I never use one)

  • Extra-Strength Adhesive like Terrifically Tacky Tape (TTT)

  • Ribbon

  • Stamps & Embellishments to decorate

  • Corner Rounder optional
  • Optional:
    • Patterned Paper
    • Punches
    • Colored Card stock
Step by Step instructions:

  1. Step 1

    Trim 3” from envelope off of the open end.

  2. Step 2

    Remove orange cutting blade from trimmer. With the opening of the envelope at the top, score in 2” from the right, left and bottom edges of the envelope.

  3. Step 3

    You will have a 2” square in each bottom corner, score from inside corner to the outer point.

  4. Step 4

    This is the point at which you decorate the front of your gift bag, staying inside the score lines.

  5. Step 5 (Optional)

    If desired, use decorative scissor or corner rounder to scallop the top of your gift bag.

  6. Step 6

    Crease the score lines and pop the envelope into a bag, carefully bringing the bottom corner squares into a point on each side.

  7. Step 7

    Use bone folder to give points a crisp fold.

  8. Step 8

    Apply extra-strength adhesive to flaps that will fold in to the bottom of the bag.

  9. Step 9

    Fold flaps in to form bottom of the bag. Bottom will measure 5” x 4”.

  10. Step 10

    Punch holes through all layers of top edge for ribbon closure.

  11. Step 11

    Embellish the front of bag for gift giving.


Friday, November 23, 2007

Paper Bag Brag Books


You Will Need:
  • 3 paper bags (per book)
  • Hole Punch
  • Scrapbooking paper
  • Ribbon bits
  • Adhesive (glue stick, glue dots, tape runner, etc.)
  • Embellishments (buttons, brads, rub-ons, stamps)
  • Ink Pads (optional


Making the Books:

  • Fold your paper bags in half
  • Punch 4-5 holes along the crease of one folded bag, then use that one to mark and punch holes on the remaining 2 bags.
  • Using a stamp pad or other inking device, ink the edges of your bags, front and back.
  • Now get creative! Treat each side of your folded bags like a mini scrapbook page and paper, stamp and embellish to your heart's delight!
  • Make large tags out of your left over odds and ends to stick into the 3 open bag ends in your book. Don't forget to put lots of ribbon on the ends to make it easier to pull them back out!
  • To Finish, use your ribbon bits to tie your "pages" together into a cute little brag book that is ready for pictures, quotes, or whatever your heart desires!


Tuesday, October 30, 2007

Marble Magnets


You will need:

  • Jumbo Gems (clear) (they measure about 1 1/4" diameter)
  • .75 inch (19mm) circle magnets (these are cheapest at Walmart
    $5.99 for 50 magnets)
  • 1 1/4 inch circle punch (no punch? tracing a rock and cutting by hand is tedious but cheap!)
  • Xyron Maching (mod podge or tacky glue works too)
  • hot glue gun
  • Cute scrapbooking paper, catalog clippings, newspaper,
  • anything!

Making the Magnets:

  1. Use circle punch to create as many circles as you will make magnets for.
  2. Xyron Users: feed circles into machine FACE DOWN so decorative side of paper will be sticky. Adhere to flat side of gem.
  3. Glue Users: Place a dime-size dab of glue in center of paper circle. Place on flat side of gem and then smooth outward. For extra hold and a smoother look, brush entire bottom of gem with glue after paper has been adhered and let dry.
  4. Hot glue magnets to bottom of gem and Voila! You're done!

Extra tips:


  • Play with different sized gems, and mix and match for cute sets of magnets.
  • Print or stamp letters onto your paper for a more personalized touch
  • The black and white magnets pictured here were cut from an old scrapbooking catalog. Don't be afraid to use whatever you have around!