Tuesday, October 30, 2007

Marble Magnets


You will need:

  • Jumbo Gems (clear) (they measure about 1 1/4" diameter)
  • .75 inch (19mm) circle magnets (these are cheapest at Walmart
    $5.99 for 50 magnets)
  • 1 1/4 inch circle punch (no punch? tracing a rock and cutting by hand is tedious but cheap!)
  • Xyron Maching (mod podge or tacky glue works too)
  • hot glue gun
  • Cute scrapbooking paper, catalog clippings, newspaper,
  • anything!

Making the Magnets:

  1. Use circle punch to create as many circles as you will make magnets for.
  2. Xyron Users: feed circles into machine FACE DOWN so decorative side of paper will be sticky. Adhere to flat side of gem.
  3. Glue Users: Place a dime-size dab of glue in center of paper circle. Place on flat side of gem and then smooth outward. For extra hold and a smoother look, brush entire bottom of gem with glue after paper has been adhered and let dry.
  4. Hot glue magnets to bottom of gem and Voila! You're done!

Extra tips:


  • Play with different sized gems, and mix and match for cute sets of magnets.
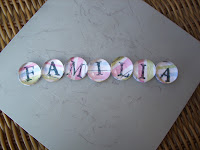
  • Print or stamp letters onto your paper for a more personalized touch
  • The black and white magnets pictured here were cut from an old scrapbooking catalog. Don't be afraid to use whatever you have around!

Girlie Hair Clips


You will need:


  • Salon Clips (Metal single prong clips)

  • 3/8" grosgrain ribbon (the more colors, the better!)

  • Terrifically Tacky Tape by Art Accentz

  • Hot Glue Gun

  • Silk Flowers (we recommend cheap roses or daises with petals removed completely from the stems and centers or packaged petals in the scrapbooking isles)

  • Decorative brads or buttons

  • Silk, Sheer, or Embroidered Ribbon for embellishment

Making the Clips:


  1. Cut your grosgrain ribbon into 4 1/2 inch strips (for covering clips)

  2. Cut Terrifically Tacky Tape using same measurements.

  3. Adhere tape to ribbon (keeping it centered) and remove red backing from tape.

  4. Place one end of ribbon inside clip near the spring and press sticky side to the inside of the top prong. Continue pressing ribbon along top of clip, inside back of clip and onto the bottom. (If all you want are cute, ribbon-covered clips, your work is done!)

  5. For flower clips, choose your petals (making sure all plastic spacers, centers and stems have been removed)

  6. Insert and open decorative brad, then glue to ribbon covered clip. I like to put a piece of Tacky Tape across the open brad prongs before gluing for extra stickiness.

Extra Tips:


  • You CAN skip the tacky tape and just use hot glue, but the tape does make the job quicker and cleaner.

  • For adding decorative ribbon behind flowers with brad centers, simply arrange your ribbon, use some sort of piercing tool to put a small hole through the center of your arrangement, then insert brad (with flower already in place) and open on other side of ribbon. You can then use small dabs of hot glue to keep ribbon in just the right place behind the petals.

  • Buttons make cute centers too, either hot glue them to flowers, and then glue the flowers to the clips, or use thread or floral wire to place them.

  • For non-slip clips, purchase non-slip drawer liners at the dollar store and hot glue one small strip to the inside of your top prong.

Thursday, October 18, 2007

Diva Days

Today the four of us decided to get together on a whim and whip up some totally awesome hair clips for our girls. It was more of a Mommy Play Date than anything else, and we had so much fun we decided to do it every other week for as long as we all live within driving distance of each other. For future reference and friend-sharing we also decided to immortalize our projects on this blog (along with anything else that suits our fancy) in order to pass on the fun. Coming soon we will have pics and instructions for making todays killer clips!