We're always looking for great ways to keep our kids entertained and quiet during church. Hopefully this next project will do that while teaching them at the same time. The idea comes from
The Idea Door. It is an ABC book with a page of pictures and words for every letter of the alphabet. All of the pictures are gospel based, so it's great for Sundays! They provided a pdf document with the graphics in 8 1/2 x 11 size. I imported them into a word document and made them smaller so they will fit in little photo protectors and make a perfect size book for little hands. The pages are about 4x5. The file can be emailed to anyone who would like to use it.
Here's what you need:
- Printout of pages-get from email. Print in color on white cardstock-there are 8 pages including title page.
- Paper cutter or scissors
- Adhesive (glue stick, rubber cement, photo squares, etc.)
- 27 Photo Savers-laminating pouches. Or plan to laminate book before binding. You can get these at Staples or any office supply store. If you have a hard time finding them, I think I could get some for you, but they might be kind of pricey :)


- Pictures: I just printed these out with my printer onto cardstock, but you can use pictures that you have developed. See instructions below.
- A is for Angel (optional)- this page has its own pictures, but I had one of Lydia dressed up like an angel for our nativity program, so I used that.
- D is for Daddy- I printed 2 pictures of Daddy to cover the ones already on the page.
- E is for eternity- 1 or 2 pictures of you on your wedding day or the family at the temple.
- F is for family- 1 or 2 pictures of the family
- G is for grandparents- pictures of all grandparents
- I is for I am a child of God- 1 or 2 pictures of your kids, I put one in of cousins on this page.
- M is for Mommy- 1 or 2 pictures of Mommy
- P is for prophet- I changed this one because it had two pictures of President Hinckley. I put Joseph Smith and President Monson. I also changed the text. If you want it to be different than the way I did it, print out whatever you want :)
- W is for wisemen- (optional) 1 or 2 pictures of family members dressed like wise men (maybe from Christmas).
- Y is for you- 1 or 2 pictures of your baby/child or both.
- Graphics are provided on all of the pages.
- Plan to bind book at copy store, or
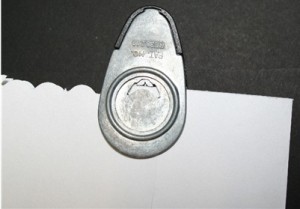
- Hole punch and multi-purpose rings
To print the right size pictures in WORD:
- Import the pictures into document(Insert, Picture, From File OR copy and paste)
- Crop them using the image tools.
- To make them the perfect size, double click on the picture, select the size tab. Type in the size that you want the picture to be. I measured the space I wanted to fill in the book and chose sizes accordingly.
Instructions:
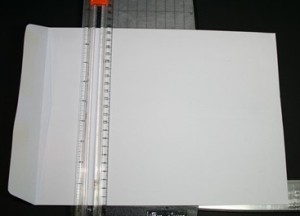
- Take page printouts and cut each page to 5 1/4 x 4 inches.
- Crop pictures with scissors or paper cutter.
- Glue pictures to pages with adhesive
- Take laminating pouches and position page inside.

 ***Make sure you line it up so that the crease is on the RIGHT side of the page-this will keep your book together. The binding will be along the side of the laminating pouch that opens. *** Make sure it's right before doing next step.
- Peel off grid liner and firmly seal around page.
- Take to copy store to have spiral bound OR punch holes and use multi-purpose rings. It cost me 3.99 at Kinkos to get my book bound. I would recommend calling elsewhere to see if you can get a better deal.
- You're Done! If you have a highly destructive child (like mine) don't leave her alone with it in the back seat, or your pages will be bent before you even get home from Kinkos.