I got this recipe from my sister-in-law who is lactose intolerant and makes these to fill her sweet tooth cookie-indulgance craving.
1 cup brown sugar
1 cup white sugar
1 cup crisco
2 eggs
1/2 tsp salt
1 tsp baking powder
1tsp baking soda
1 tsp vanilla
2 cups flour
2 1/2 cups oatmeal
2 cups chocolate chips
bake at 375 degrees for 8 minutes
Monday, February 2, 2009


Friday, January 16, 2009
Quick Chocolate Sheet Cake
Mix together in bowl:
2 cups flour
2 cups sugar
1/2 tsp salt
Heat on stove:
2 cups butter
1 cup water
2 Tbs. cocoa
Pour hot mixutre over flour mixture
Add :
2 eggs
1 tsp. soda
1 tsp. vanilla
1/2 cup milk
Bake at 350 for 20 min.
2 cups flour
2 cups sugar
1/2 tsp salt
Heat on stove:
2 cups butter
1 cup water
2 Tbs. cocoa
Pour hot mixutre over flour mixture
Add :
2 eggs
1 tsp. soda
1 tsp. vanilla
1/2 cup milk
Bake at 350 for 20 min.
Tuesday, January 6, 2009
Quiet Time Nesting Shapes
Next Divas:
Tuesday, January 13th
Gram's
12:00 p.m.
What you'll need:
-bring any scraps you might have that would be cute for the shapes(you could even patchwork fabrics together if you don't have large pieces)
-you can also bring thin batting scraps to line your shapes with
-the largest shape will be about 10" by 10", the next 8" x 8", the next 6"x 6", etc-you can make as many as you want
-whatever closures you want (zipper, snap, tie, clip, button, velcro-might be noisy at church, etc.)
-sewing machine, thread, scissors, pencil, paper(just white computer paper)
Tuesday, January 13th
Gram's
12:00 p.m.
What you'll need:
-bring any scraps you might have that would be cute for the shapes(you could even patchwork fabrics together if you don't have large pieces)
-you can also bring thin batting scraps to line your shapes with
-the largest shape will be about 10" by 10", the next 8" x 8", the next 6"x 6", etc-you can make as many as you want
-whatever closures you want (zipper, snap, tie, clip, button, velcro-might be noisy at church, etc.)
-sewing machine, thread, scissors, pencil, paper(just white computer paper)
Saturday, November 15, 2008
Decking the Halls Again!!!
Christmas Tree Skirt
Tuesday, December 18th at Gram's
12:00 noon
Tuesday, December 18th at Gram's
12:00 noon
 Print out this sheet to help you at the fabric store:
Friday, October 3, 2008
No-Sew or Some-Sew Pillows
Date: Tuesday October 14th
Time: Noon
Location: TBA
 Materials:
*Pillow Form
*Fabric (A flat bed sheet works well if you can find it in the right color)
*Matching thread
*Large Button for each pillow
Thanks for the picture & Idea, Pottery Barn!
Time: Noon
Location: TBA
No-Sew Pillow How-To

Lay a 20-inch square cloth napkin face down, positioning it to resemble a diamond. Center a 12- or 14-inch square pillow form on napkin. Fold in 2 side points of napkin to middle, then fold up bottom point. Hand-stitch through all 3 pieces of fabric along upside-down V, about 2 inches down on each side. Stitch a button to bottom flap near point. Fold down top flap; sew a loop of cord to underside of fabric as a button holder, ensuring it fits snugly around button when closed.
Thanks, Martha!
 Materials:
*Pillow Form
*Fabric (A flat bed sheet works well if you can find it in the right color)
*Matching thread
*Large Button for each pillow
Thanks for the picture & Idea, Pottery Barn!
Tuesday, September 30, 2008
White Sandwich Bread

I found this recipe off of the Fresh Loaf website and use it weekly! My husband is disappointed if I buy bread from the store!
Ingredients
2 cups all-purpose enriched unbleached flour
1 cup bread flour (or all-purpose flour, if you do not have bread flour)
1 teaspoon yeast
1 teaspoon salt
1/8 cup sugar
1 cup warm milk
2 tablespoons butter
1/4 - 1/2 cup lukewarm water
Directions
Mix the dry ingredients, then add the wet ingredients. Mix and adjust water until all ingredients are incorporated and the dough is capable of forming a ball. Pour the dough onto a flat, floured surface and knead for approximately ten minutes.
Return the dough to an oiled bowl and let rise until doubled in size, approximately 90 minutes. Shape the loaf and then let rise again until the desired size is reached, approximately another hour.*
Bake at 350 for 40 to 45 minutes, until when tapping the bottom of loaf the bread springs back and makes a hollow sound.
Return the dough to an oiled bowl and let rise until doubled in size, approximately 90 minutes. Shape the loaf and then let rise again until the desired size is reached, approximately another hour.*
Bake at 350 for 40 to 45 minutes, until when tapping the bottom of loaf the bread springs back and makes a hollow sound.
Tuesday, September 9, 2008
Roman Shades
Okay, Divas! The next project is Roman Shades. Here's some pictures of how we hope they'll turn out:


Date: Tuesday, Sept. 16th
Time: 12:00 p.m.
Place: Provo @ Gram's
The pattern has been emailed to a few Divas, if you want it, let us know and we'll get it to you.
What you'll need:
*Note: The amounts of the supplies that you need depend on the size of shade that you are making. The following worksheets will help you make all the calculations. Print both pages then grab a pencil, measuring tape, calculator, and some chocolate and have fun!


Bring:
Time: 12:00 p.m.
Place: Provo @ Gram's
The pattern has been emailed to a few Divas, if you want it, let us know and we'll get it to you.
What you'll need:
*Note: The amounts of the supplies that you need depend on the size of shade that you are making. The following worksheets will help you make all the calculations. Print both pages then grab a pencil, measuring tape, calculator, and some chocolate and have fun!


- Designer fabric
- Thread to match designer fabric (invisible nylon thread will work great)
- Lining fabric (Block-Out or heavy fabric).
- Polyester Cord
- Plastic Rings
- Mounting board
- Weight Rod
- Screw Eyes (one for each cord)
Bring:
- Sewing Machine with Zipper Foot
- Scissors
- Seam Ripper (hopefully you won't really need it)
- Staple Gun
- Fabric marking pen
- Measuring Tape
- Calculator
Thursday, September 4, 2008
Grandma's Breakfast Casserole Souffle
This is a crowd pleaser every time! I never make this without having to give out the recipe!
8 slices white bread, crust trimmed and cubed
2 cups cheese, diced
1 ½ lbs sausage browned
Place bread in bottom of oblong pyrex baking dish. Place cheese evenly on top. Sprinkle sausage on top of the cheese.
2 ½ cups milk
4 eggs slightly beaten
¾ tsp dry mustard
Mix and pour evenly over bread, cheese and sausage. Let stand over night in refrigerator.
1 cup cream of mushroom soup
½ cup milk
Before baking, mix soup and milk and pour over soufflé. Bake at 275 degrees for 1 ½ hour or until center is set. Serve immediately
8 slices white bread, crust trimmed and cubed
2 cups cheese, diced
1 ½ lbs sausage browned
Place bread in bottom of oblong pyrex baking dish. Place cheese evenly on top. Sprinkle sausage on top of the cheese.
2 ½ cups milk
4 eggs slightly beaten
¾ tsp dry mustard
Mix and pour evenly over bread, cheese and sausage. Let stand over night in refrigerator.
1 cup cream of mushroom soup
½ cup milk
Before baking, mix soup and milk and pour over soufflé. Bake at 275 degrees for 1 ½ hour or until center is set. Serve immediately
Lisa's Carrot Cookies
These are delicious, fluffy cookies that are sweet, yummy, and have vegetables in them too!
Boil 2 cups carrots (drain water & mash)
Mix carrots with 1 ½ cup Crisco or shortening
2 cups sugar
2 eggs
2 tsp vanilla
2 tsp baking powder
1 tsp salt
4 cups flour
8-10 minutes @ 350
(do not grease cookie sheet)
1 box powdered sugar
2 tblsp butter
Orange juice to flavor (can substitute lemon also)
Boil 2 cups carrots (drain water & mash)
Mix carrots with 1 ½ cup Crisco or shortening
2 cups sugar
2 eggs
2 tsp vanilla
2 tsp baking powder
1 tsp salt
4 cups flour
8-10 minutes @ 350
(do not grease cookie sheet)
1 box powdered sugar
2 tblsp butter
Orange juice to flavor (can substitute lemon also)
Karen's Cinnamon Rolls
Combine:
½ cup lukewarm water
1 pkg yeast
1 tbspn sugar
Mix and let stand in a warm place
1 beaten egg
¼ cup melted butter
2 ½ cup lukewarm water
½ cup dry nonfat milk
1 ½ tsp salt
½ cup sugar
Mix together and add yeast mixture.
Add 8 cups flour.
Knead for 10 min on floured board.
Place in a greased round bowl. Spray with oil and cover.
Let rise until double in size (2-3 hours).
Punch down and divide in half. Spray surface with cooking spray and roll out into ½ inch thick rectangle. Spread with butter. Sprinkle layer of brown sugar and shake cinnamon. Roll up from long side and pinch ends. Cut with string in 3” widths. Place in casserole dish sprayed with cooking spray. Let rise 1 hour.
Bake at 375 degrees for 17-20 min.
Frosting:
¾ cup butter/margarine (softened)
2-3oz. pkgs cream cheese (softened)
1 tsp vanilla
3 cups powdered sugar
½ cup lukewarm water
1 pkg yeast
1 tbspn sugar
Mix and let stand in a warm place
1 beaten egg
¼ cup melted butter
2 ½ cup lukewarm water
½ cup dry nonfat milk
1 ½ tsp salt
½ cup sugar
Mix together and add yeast mixture.
Add 8 cups flour.
Knead for 10 min on floured board.
Place in a greased round bowl. Spray with oil and cover.
Let rise until double in size (2-3 hours).
Punch down and divide in half. Spray surface with cooking spray and roll out into ½ inch thick rectangle. Spread with butter. Sprinkle layer of brown sugar and shake cinnamon. Roll up from long side and pinch ends. Cut with string in 3” widths. Place in casserole dish sprayed with cooking spray. Let rise 1 hour.
Bake at 375 degrees for 17-20 min.
Frosting:
¾ cup butter/margarine (softened)
2-3oz. pkgs cream cheese (softened)
1 tsp vanilla
3 cups powdered sugar
Easy Wall Art
We made some fantabulous canvas wall art that goes for big bucks at Pottery Barn and Pier 1, but was pretty cheap and VERY easy to make. If you want the project to be more involved, you can really go to town with different mediums and embellishments. We'll give instructions for the easy way, then extra tips for the more extravagant route. (For ideas on the more extravagant route, check out these ladies at http://winborgdesign.blogspot.com/)
You Will Need:


Tips for Extravagance:
 can really go to town with different mediums and embellishments. We'll give instructions for the easy way, then extra tips for the more extravagant route. (For ideas on the more extravagant route, check out these ladies at http://winborgdesign.blogspot.com/)
You Will Need:
- Stretched Canvas, any size or dimension (available at craft and art stores, we got ours on sale at JoAnne's for half price)
- Mod Podge or other craft glue. This will be used to glue and seal our project so make sure that it is a glue that dries clear.
- Sponge brush (also available in craft stores, but also at Walmart, usually 3 for $1)
- Scrapbook papers
- (Optional) Cheap acrylic paints that match your papers (you can get these at walmart for about $1 a piece, and you only need a few)
- (Optional) Paint brush (something big and chunky will do the trick)
- Decide what you want on your canvas. Emily got her inspiration from some Pottery Barn flower art. You could do animals, geometric shapes, something related to your child's hobby, anything! We saw a very cute one on 3 canvases that was a catarpillar with 2 big green paper circles of different patterns on each canvas, and little feet painted on. Get Creative!
- Cut out your paper in the shape/size that you want (we made a template first so as not to make mistakes on our cute paper).
- (Optional) Use paint in matching/accenting colors to add shadow, contrast or pizazz to your shape- especially if you will be layering multiple papers.
- Let dry
- Use your sponge brush to cover the back of your paper image with glue, making sure the entire shape is well covered.
- Place in desired location on canvas and carefully smooth out any bubbles or bumps.
- Once all pieces are in place, load sponge brush heavily with glue and begin brushing over the entire canvas. Go slowly over papered areas to prevent tearing or wrinkling. It is best to work brush strokes in one direction (up and down or side to side) for a more uniform look. Brush strokes will be visible once dry, but this is part of the "look."
- Let dry, and hang!


Tips for Extravagance:
- Add pictures to your art the same way you add paper. Black and white are particularly eye-catching in wall art
- Scrapbook paper can be art in itself, create a collage of coordinating papers in different shapes and sizes, glue them on, seal with glue for a finished look and hang.
- Distress: use sandpaper to rough up the edges of papers and pictures, Ink edges with black or brown stamp pads, water down white paint and fade a picture by brushing on a light whitewash, tear papers or even pictures (gasp!) to complete that vintage look.
- Embellish: Stamp or write letters, slogans or phrases, add brads, eyelettes, decorated tags. You can also paint or ink large chipboard letters for a more stand-out look.
- Glue on decorative jewels after the project has been sealed to really make your project pop!
Banana Banana Banana Bread

My husband, being a lover of banana bread, sent me on a 3 years quest for the moistest banana bread recipe known to man. I found this one and fell in love! Enjoy!
Yeild: One 9x5 inch loaf
Prep Time: 15 min
Cook Time: 1 hour 5 minutes
Total Time: 1 hour 20 min
Servings: 12
Ingredients:
· 2 cups all-purpose flour
· 1 teaspoon baking soda
· 1/4 teaspoon salt
· 1/2 cup butter
· 3/4 cup brown sugar
· 2 eggs, beaten
· 2 1/3 cups mashed overripe bananas (approx 6 large bananas)
Directions: *see extra tips below*
1. Preheat oven to 350 degrees F (175 degrees C). Lightly grease a 9x5 inch loaf pan.
2. In a large bowl, combine flour, baking soda and salt. In a separate bowl, cream together butter and brown sugar. Stir in eggs and mashed bananas until well blended. Stir banana mixture into flour mixture; stir just to moisten. Pour batter into prepared loaf pan.
3. Bake in preheated oven for 60 to 65 minutes, until a toothpick inserted into center of the loaf comes out clean. Let bread cool in pan for 10 minutes, then turn out onto a wire rack.
Extra Tips:
For my oven, I had to reduce the temperature to about 300 degrees because my loaves were burning before cooking through. You may have to do a few test loaves to find what works for your oven.
Yeild: One 9x5 inch loaf
Prep Time: 15 min
Cook Time: 1 hour 5 minutes
Total Time: 1 hour 20 min
Servings: 12
Ingredients:
· 2 cups all-purpose flour
· 1 teaspoon baking soda
· 1/4 teaspoon salt
· 1/2 cup butter
· 3/4 cup brown sugar
· 2 eggs, beaten
· 2 1/3 cups mashed overripe bananas (approx 6 large bananas)
Directions: *see extra tips below*
1. Preheat oven to 350 degrees F (175 degrees C). Lightly grease a 9x5 inch loaf pan.
2. In a large bowl, combine flour, baking soda and salt. In a separate bowl, cream together butter and brown sugar. Stir in eggs and mashed bananas until well blended. Stir banana mixture into flour mixture; stir just to moisten. Pour batter into prepared loaf pan.
3. Bake in preheated oven for 60 to 65 minutes, until a toothpick inserted into center of the loaf comes out clean. Let bread cool in pan for 10 minutes, then turn out onto a wire rack.
Extra Tips:
For my oven, I had to reduce the temperature to about 300 degrees because my loaves were burning before cooking through. You may have to do a few test loaves to find what works for your oven.
Thursday, July 31, 2008
Ideas, Anyone?
We are taking a little break during these summer months when everyone is so busy vacationing, and when we get back together in a few weeks we would like to plan out our crafts through Christmas, if possible. If you follow our blog at all and have any suggestions or ideas for projects, let us know! We can't guarantee that we will do them all, but we would love some help deciding. See you soon!
Monday, July 7, 2008
Making a Princess
 This is a VERY long post, as we made tutus and all the accessories necessary for a princess. We'll start with the tutus, then move on to crowns and wands!
Toddler Tutus
The amount of Tulle needed will depend on the size of your baby/toddler and how long and/or full you want the tutu to be. You can also buy your tulle in just one color, or as many colors as you would like. To see some examples, click HERE.
- 2 year old: 6 yards for a full, floor-length tutu, 3 yards for a full knee-length tutu
- 1 year old: 3 yards for a full or knee-length tutu, 1 1/2 yards for a very short, traditional tutu.
- Elastic for waist (measure her waist for exact measurement)
Optional Tutu accessories
- Ribbon for tying into Tutu (you can get organdy ribbon in the bridal isle of craft stores for 99 cents a spool)
- Flowers from the dollar store (we will be making accessory flower clips for the tutus, but these can also be used to be stitched straight onto the tutu


- Cut your tulle into 4" wide strips, length depending on how long you want your tutu to be **Remember, we will be knotting the tulle in half over the waist elastic, so cut your tulle twice as long as you want your tutu to be**
- Cut your waist elastic to the desired length
- Tie elastic to two chairs, then separate the chairs so the elastic is stretched tight.
- Fold one strip of tulle in half. Hold doubled strip under elastic, then pull free ends over the elastic and down through the loop formed by the folded end. (sorry, that's hard to explain, but the pictures will give you a better idea...).
- continue with all tulle strips until finished
- To close, you can knot or sew your elastic ends together. I wanted mine to be adjustable, so I tied a bell to one end of elastic and made a loop out of the other, that way I can tighten or loosen it depending on how the loop is tied.
- Embellish with bells, flowers, ribbons, beads, etc.


- If you want a fluffier tutu that doesn't tangle as easily (tulle is not very stiff and the strips can tangle) tie 3 or 4 strips together in each knot. This will keep the fluffiness but keep them straightened out better.
- Tulle vs. Netting: If you can afford it, netting might be better than tulle just because the tulle is so lightweight, it takes more to make it puffy and it can tangle, but Tulle is not as itchy as netting.
- I have also seen tutus made of pure ribbon (wired ribbon). Again, if you can afford it, those are beautiful as well.


Wands & Crowns
Here are the things you may need, depending on which style you choose:
- headband
- silk flowers
- dowel (12 inches)
- tulle (netting)
- satin ribbon to wrap dowel
- organdy ribbon for streamers
- curling ribbon for streamers
- rhinestones
- wire
- beads
- bells
- paint (if you want to paint dowel instead of wrapping)
- glue gun
- terrifically tacky tape
- glitter spray

- Run two strips of Tacky Tape the length of your dowel (one on either side). This will keep the ribbon from slipping.
- Hot glue the ribbon to the side of one of the dowel ends.
- Pull the ribbon over the end and begin wrapping dowel with ribbon, continuing to end.
- Hot glue ribbon over end of dowel.
- Wand Embellishments: We put large beads on pipe cleaners, shaped them, and glued them to our dowels BEFORE gluing on ribbon (so ribbon will cover up pipe cleaner ends). We then tied ribbon and pieces of tulle, pearls, etc to our creation.


 We bought soft, fabric covered headbands at Walmart (so they would be less irritating to our girls heads) (I believe the were $1.99 for 5), and because the colors matched our tulle color choices, we did not cover them with ribbon. If you want to cover yours with ribbon, we suggest putting tacky tape on your headband, and then using hot glue to wrap it the same as the wand.
- For beaded shapes on your crown, string beads onto a pipe cleaner, create the desired shape, and then hot glue the pipe cleaner to the headband.
- Tie strips of tulle to your headband in the same way you did for the tutu (if you did beads with pipe cleaners, this will cover up your pipe cleaners!). Add a dab of hot glue to the knot to keep it in place.
- Embellishments: You can glue on flowers, strands of pearls, or other embellishments as you wish.


Thursday, June 5, 2008
Easy Single Stitch Beanies
(For whatever size head you're looking to make)
This pattern is not a crochet how-to post, just a pattern for those who already know the basics of crochet. Really all you need to know for this is how to do a single stitch, and how to work in rounds. The 9 rounds given here should be big enough for the average toddler's head.
Time for a math refresher! This pattern is all about multiplication by 6's. Until reaching the point of the beanie size desired, you'll be counting/multiplying by 2's- 9's (give or take beanie size) and keeping multiplying until reaching #6. Then you are done with that round.
Round 1; 6 single stitches in 1st loop (6)
Round 2; 2 stitches in each single stitch (12)
Round 3; 2 stitches in 1st, 1 stitch in next; repeat (18)
(Stitch pattern= 2,1,2,1,2,1,2,1 etc..)
Round 4; 2 stitches in 1st, single stitch in next 2, repeat (24)
(SP= 2,1,1,2,1,1,2,1,1...)
Round 5; 2 stitches in 1st, single stitch in next 3, repeat (30)
(SP= 2,1,1,1,2,1,1,1,2.....)
Round 6; 2 stitches in 1st, single stitch in next 4, repeat (36)
Round 7; 2 stitches in 1st, single stitch in next 5, repeat (42)
Round 8; 2 stitches in 1st, single stitch in next 6, repeat (48)
Round 9; 2 stitches in 1st, single stitch in next 7, repeat (54)
This pattern is not a crochet how-to post, just a pattern for those who already know the basics of crochet. Really all you need to know for this is how to do a single stitch, and how to work in rounds. The 9 rounds given here should be big enough for the average toddler's head.
Time for a math refresher! This pattern is all about multiplication by 6's. Until reaching the point of the beanie size desired, you'll be counting/multiplying by 2's- 9's (give or take beanie size) and keeping multiplying until reaching #6. Then you are done with that round.
Round 1; 6 single stitches in 1st loop (6)
Round 2; 2 stitches in each single stitch (12)
Round 3; 2 stitches in 1st, 1 stitch in next; repeat (18)
(Stitch pattern= 2,1,2,1,2,1,2,1 etc..)
Round 4; 2 stitches in 1st, single stitch in next 2, repeat (24)
(SP= 2,1,1,2,1,1,2,1,1...)
Round 5; 2 stitches in 1st, single stitch in next 3, repeat (30)
(SP= 2,1,1,1,2,1,1,1,2.....)
Round 6; 2 stitches in 1st, single stitch in next 4, repeat (36)
Round 7; 2 stitches in 1st, single stitch in next 5, repeat (42)
Round 8; 2 stitches in 1st, single stitch in next 6, repeat (48)
Round 9; 2 stitches in 1st, single stitch in next 7, repeat (54)
- When your beanie has a round "placemat" look and it's about the size of the crown of the head you are making it for. (It's the size of the crown when it looks like the small head covering Jewish men wear) Finish the Round you are on and then stop adding stitches and do only single stitches until the beanie is the length desired.
- When finished, tie off the yarn and cut it a generous distance from the knot. Then use a yarn needle to thread the remainder up through the weave of the beanie.
- The tightness of your yarn will play a huge roll in how many Rounds will be needed in your beanie. Example- tight stitches will equal more rounds.
- The goal is to gradually "grow" the beanie so there won't be bumps or lumps.
- For beanies to fit a larger sized head, continue adding a single stitch between the double stitches as you've done before. (example: Round 10; 2 stitches in 1st, single stitch in next 8, repeat (60) )
Wednesday, May 7, 2008
More Girlie Hair Clips
Since our girls seem to have a knack for losing their clips, we decided to extend our adventures in hair clips and try some new ideas, both for the clips themselves and their uses. 
Bow Clips:
For these you will need some floral wire (or any very fine wire) and everything listed on the original girlie hairclips post.


Bow Clips:
For these you will need some floral wire (or any very fine wire) and everything listed on the original girlie hairclips post.
- Cover your clip with ribbon
- For a traditional bow, fold your ribbon into a long rectangle, and pinch in the middle, forming little dimples on each side of your fingers.
- For a layered bow (like the red one pictured at right), fold your ribbon into a rectangle, pinch in the middle, and
continue folding back and forth across the center until you have the desired number of layers. (for patterned ribbon you will have to twist the ribbon at the center each time you fold to keep the pattern face-up) - Wrap pinched center with wire 2 or 3 times to hold shape
- Cover wire with a short strip of ribbon hotglued at the back of the bow
- Glue bow to clip

Other Tips and Ideas:
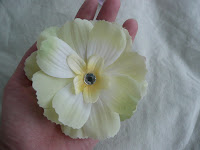
I made the large flower clip pictured at right entirely out of embellishments bought from the dollar store. Because it is spring, they had TONS of beautiful flowers for $1 a stem and about 8 flowers per stem. The jewel center was part of a cell-phone decorating kit I found (15 jewels per kit, also $1) and hot glued to my center. Beauty CAN be cheap!

On cold days, embellish a beanie with a big flower clip like the one pictured here. It can turn even the most boring beanie into a fashion statement! (These beanies are also very easy to make if you use the Knifty Knitter- you can easily make one for a little girl in about an hour)
For play-time, clip them into the waist of a dress-up tu-tu (tutorial on making the tu-tus coming soon...) as interchangeable accessories!
The possibilities are endless..... :)
Monday, May 5, 2008
Look, No hands!


Oh-so-fancy Baby Slings

What you will need:
- Fabric: You will need a total of 3-4 yards of fabric- Either 3-4 yards of one fabric, or 1.5-2 yards each of two coordinating fabrics.
Sizing: Kelli is an XXS and her sling is 21" x 52". This will take about 1.5 yards of each fabric. You can adjust the amount of fabric you will need depending on your bust, shoulder width, hips, and height.
Choose a heavier-weight woven fabric (one that doesn't stretch) - Note: 3-4 yards of fabric will be enough to sew 2 complete slings -but you need to buy that much to get the length for two different prints.
- Pattern
- Sewing Machine

- Thread
- Cotton Piping: about 12 inches of 3/4 inch thick (this is about the thickness of a Crayola marker).

Making the Sling:
- Fold fabric in half and place short end of pattern along fold. Pin pattern in place and cut fabric. (repeat for 2nd fabric if you have it)

- Place cut fabric right sides together and stitch around all sides, leaving a small hole open for turning.
- Turn and press.
- Optional Step: When carrying a toddler in the sling, the fabric can hurt the back of their knees where they sit. We added piping to one side of the sling as padding for their knees. To add padding, insert piping into open hole used for turning. Center piping along one of the long sides of the fabric and pin in place. Stitch a casing around piping to hold it in place.

- Close hole (tuck in edges of fabric and stitch through them as close to the edge as possible.)
- Top stitch 1/4" from edge around all sides.
- Fold fabric in half and line up curved edges. Pin along curved edge.
- Stitch along curved edge, following top-stitch line already sewn.
- Open up sling behind curved edge. Fold curved edge to the side so it lays flat with the rest of the fabric. Pin and stitch as
 close to the edge as possible. (this way your seam will lie flat with your fabric when you wear the sling, and adds strength to your seam.)
 - Load up your baby and go!


Extra Tips
- Before you insert your piping, make sure and tape the ends to prevent fraying. Also, if you have to cut it, tape above
 where you will cut, and then cut. (It's easier!)
 - Our sling pattern is about a size small. If you need to make a sling for a taller/bustier mom, just make it longer (not wider). The width fits the baby, length fits you.


Friday, April 11, 2008
Pee Pee Tee Pees

I saw these at the Baby Expo the other day and just had to make some of my own just because they were so funny! Apparently the Tee-Pees serve as a little shield to keep you from getting sprayed when you change your baby boy's diaper. :)
You Will Need:

- Fabric strips (I have seen flannel and terrycloth used) at least 7" wide and length depending on how many you plan on making.
- Thread
- Sewing Machine
- Paper and scissors for making pattern
- Cup or small bowl for making pattern (circle should probably be at least 4" across)
Making the Tee Pees
- On my pattern, I have the diameter as 4 1/2" across, but another blogger found that a 6" diameter worked better, so you might want to find a cup or bowl about that diameter.
- Use the cup or small bowl to draw a circle on your paper and cut it out.
- Fold circle in half and then in half again to make an "x" marking the center of your circle
- Draw a line from the center down the middle of one of the quarters of your circle.
- Now cut out half the circle plus the little half-quarter piece, and this is your pattern.
- Use your pattern to cut out two semi-circles.
- Sew the two pieces right-sides together leaving one straight edge open for turning.
- Turn right-side out, tuck in the open seam (so raw edges are inside) and press.
- Sew the two straight edges together, and you're done!


Subscribe to:
Posts (Atom)